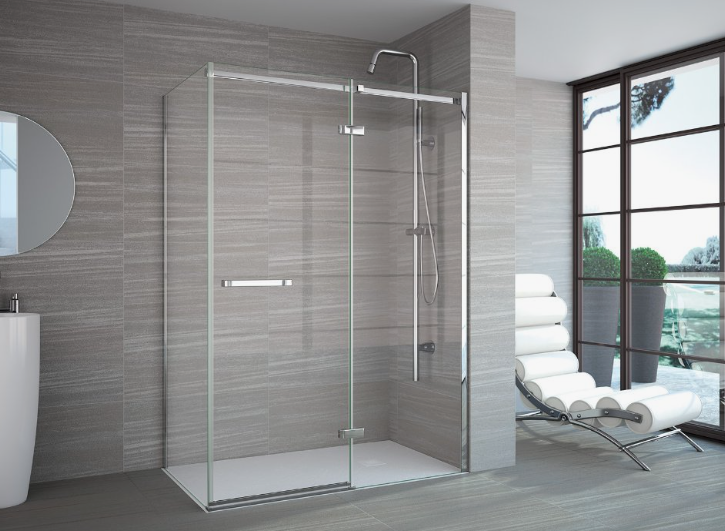
Frameless glass shower doors are one of the most popular upgrades in modern bathroom design. They create a clean, open, and luxurious feel while increasing property value. However, what many homeowners don’t realize is that their beauty depends heavily on a precise and professional installation process.
At Lookout Frameless Shower Doors, installation is done with careful planning, expert craftsmanship, and attention to every small detail. Below is a complete guide on how frameless glass shower doors are installed and what makes the process so precise.
1. Initial Consultation and Accurate Measurement
Every installation begins with a detailed on-site consultation. This step is critical because frameless glass doors do not rely on a metal frame for adjustment.
Installers measure:
- Shower opening width and height
- Wall angles (to check if walls are plumb)
- Floor level and slope
- Tile condition and strength
Even a few millimeters of error can affect alignment, so professional measurement is essential.
2. Choosing the Right Glass and Design
Before fabrication, homeowners choose the design that fits their bathroom style.
Common options include:
- Pivot doors (swing open like a door)
- Sliding frameless doors (ideal for small bathrooms)
- Fixed glass panels (walk-in showers)
The glass used is always tempered safety glass, typically the following:
- 3/8 inch (10mm)
- 1/2 inch (12mm) for larger panels
This glass is heat-treated for strength and safety.
3. Custom Glass Fabrication
Once measurements are confirmed, the glass is custom-cut in a controlled factory environment.
This includes:
- Precision cutting
- Edge polishing for safety and appearance
- Drilling holes for handles and hinges
- Quality inspection
Since every bathroom is unique, frameless glass is never “one size fits all.”
4. Preparing the Shower Area
Before installation begins, the workspace is carefully prepared.
Installers:
- Clean and dry all surfaces
- Mark exact hardware positions
- Protect tiles, tubs, and flooring
- Verify wall structure for secure mounting
This step ensures a clean and damage-free installation process.
5. Installing Heavy-Duty Hardware
Frameless glass doors depend entirely on hardware for support.
Installers securely mount:
- Wall hinges
- Glass clamps
- Support brackets
- Floor or ceiling anchors (if needed)
All hardware must be drilled into solid support behind tiles—not just tile surface—to ensure long-term stability.
6. Setting the Glass Panels
This is the most delicate step in the process.
Because tempered glass is heavy and fragile before installation, it is handled by trained professionals using suction lifters and support tools.
Installers:
- Carefully position the glass
- Align panels with precise spacing
- Ensure level vertical and horizontal placement
Even a slight misalignment can affect door movement.
7. Adjustments and Alignment
Once the glass is set, fine adjustments are made.
This includes:
- Adjusting hinge tension
- Ensuring smooth door swing
- Correcting spacing between panels
- Preventing glass-to-glass contact
Proper alignment ensures the door opens and closes effortlessly without strain on the hardware.
8. Sealing and Waterproofing
To prevent leaks, clear silicone sealant is applied along the following:
- Wall edges
- Fixed glass joints
- Base contact points
This step keeps water inside the shower area while maintaining a seamless frameless appearance.
9. Final Inspection and Cleaning
Before completion, a full inspection is performed:
- Stability test of glass panels
- Hardware strength check
- Door movement test
- Leak inspection
The glass is then cleaned, polished, and left spotless.
Why Professional Installation Matters
Frameless glass shower doors may look simple, but installation is highly technical. Poor installation can lead to:
- Misaligned doors
- Water leakage
- Glass stress cracks
- Hardware failure
- Safety risks
Hiring professionals like Lookout Frameless Shower Doors ensures long-term durability, safety, and a flawless finish.
Maintenance Tips After Installation
To keep your shower looking new:
- Clean glass weekly with a squeegee
- Use mild, non-abrasive cleaners
- Avoid harsh chemicals on hardware
- Dry hinges occasionally to prevent buildup
Proper maintenance helps prevent water spots and keeps the glass crystal clear.
Common Installation Challenges
Even professionals must account for:
Uneven walls or floors
Older homes may require adjustments or shimming.
Tile drilling risks
Improper drilling can crack tiles, so precision tools are used.
Weight handling
Large glass panels require multiple installers for safety.
Benefits of Frameless Glass Shower Doors
- Modern, luxury appearance
- Makes bathrooms look larger
- Easy to clean (no metal frames)
- Custom design flexibility
- Increases home value
FAQs
1. How long does installation take?
Most installations take 2–4 hours, depending on complexity.
2. Is frameless glass safe?
Yes. It uses tempered safety glass, which is extremely strong and designed to break safely if damaged.
3. Can it be installed in any bathroom?
Yes, but measurements must confirm structural support and proper spacing.
4. How thick is frameless shower glass?
Usually 3/8 inch or 1/2 inch tempered glass.
5. Does it leak water?
When installed correctly with proper sealing, leaks are minimal to none.
Conclusion
Installing frameless glass shower doors is a precise process that requires skill, accuracy, and experience. From measurement to final sealing, every step plays a critical role in achieving a perfect finish.
With professional installation from Lookout Frameless Shower Doors, homeowners get a modern, durable, and elegant shower solution that transforms the entire bathroom space.